
Use partner benefits in other tenant
 Krähe mit Hut
Microsoft partners are not only allowed to provide licenses to their customers but also receive free licenses for their own use—known as Partner Benefits—depending on their status. These licenses may be used not only in the partner’s tenant but in all tenants owned by the company. Accordingly, some of the licenses can also be used for other purposes if not all benefits can be put to good use in the production environment.
However, those accustomed to the previous procedure for redeeming benefits may initially find the new fiscal year confusing (the old procedure may still work for now, but a transition to the new system is definitely underway). Therefore, this article explains the new procedure for redeeming Partner Benefits in a different tenant.
The previous procedure
In recent years, the process for redeeming partner benefits has been as follows:
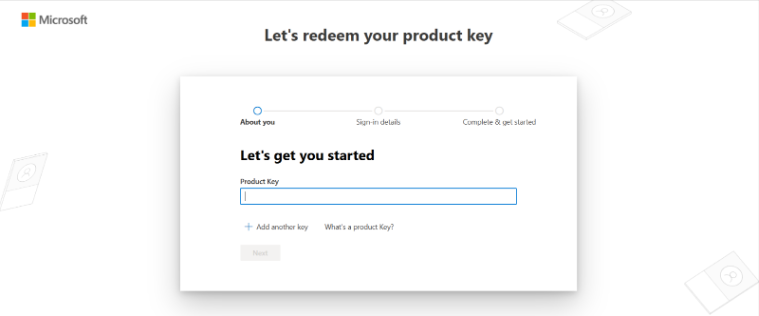
- Open the list of available benefits: Benefits - Cloud services
- Select the desired benefit and redeem it
- Go to the website for redeeming product keys and log in with a user in the target client who has at least the “License Administrator” role
- Enter the product key and redeem it
Depending on how far along Microsoft is with the transition of partner accounts, this process may still be available. However, it will soon be replaced by a new process that, in principle, simplifies the procedure.
The new procedure
Under the new process, benefits are no longer redeemed using product keys. Instead, redemption is done through a so-called billing profile, which can be viewed via the Azure portal: Cost management + billing - Microsoft Azure.
If the partner tenant and the production tenant are the same, no additional steps are required. In this case, redeeming benefits is greatly simplified, as there is no need to enter a product key separately via the website. However, if the partner tenant and the production tenant are separate (as required by Microsoft) or if benefits are to be redeemed in a third tenant (e.g., development, testing, etc.), then the steps described in the following chapters must be followed.
Prerequisites
The following is required for configuration:
Partner tenant:
- User account with the “Billing Administrator” role or higher
- User account with the “Microsoft AI Cloud Partner Program Partner Admin” role for access to the “Benefits” section in the Partner Center
Target tenant for redemption:
- User account with the “Global Administrator” role and an active mailbox
- Instance ID of the Entra instance (can be found via the following link: Microsoft Entra - Microsoft Entra Admin Center)
Configuration
If all requirements are met, proceed as follows.
Associate billing tenant
First, you must assign the tenant in which the benefits are to be redeemed via the Azure portal:
- Go to the Benefits section in the Partner Center and select the benefit you want to redeem
- Make a note of the billing profile ID
- Go to Cost Management + Billing - Microsoft Azure
- Click on the name of the billing scope highlighted in blue
If there are multiple billing scopes, you must first identify the correct one. You can verify this using the ID you noted earlier, which appears below the billing scope in the “Billing > Billing Profiles” menu. If the ID does not match, select a different billing scope.
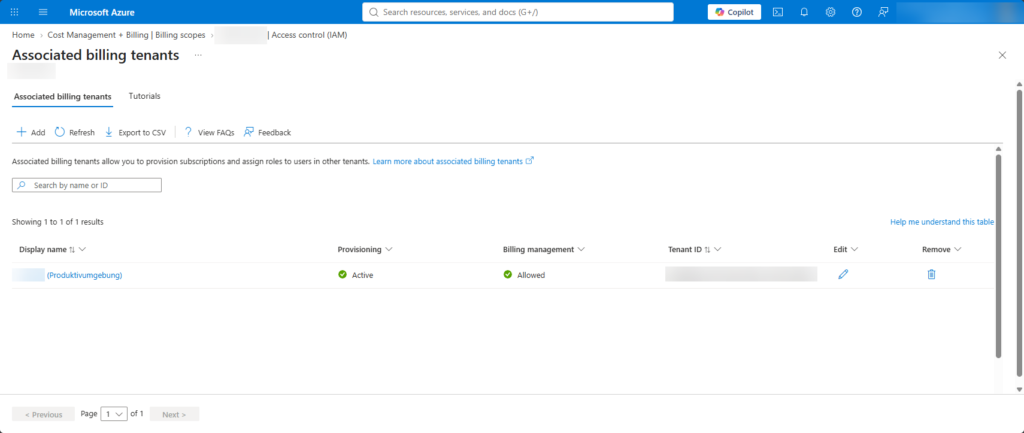
- In the correct billing area, click “Quick Access > Access Control (IAM)” in the menu on the left
- Click “Associated billing tenants” at the top
- Click “+ Add” at the top—a new menu will open on the side
- Enter the tenant ID of the target tenant and assign any display name (e.g., “Contoso - Development”), check both options at the bottom, and click “Add”
The target tenant is now associated.
Setting up access for partner tenant
Next, a user from the target tenant must be invited who has the permission to grant access to the target tenant's billing profile. The “Global Administrator” role is required for this. The invited user will also receive an email containing a link that must be used to confirm access.
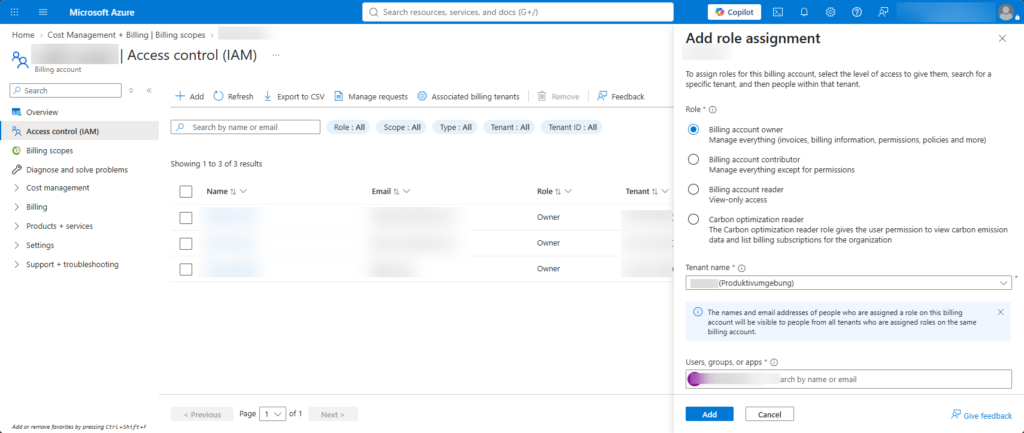
- Below the billing section, click “Quick Access > Access Control (IAM)” again
- Click “+ Add” at the top—a new menu will open on the side
- Role: “Billing Account Owner”
- Tenant Name: “”
- Users, Groups, or Apps: “”
- “Add”
Once the user has been successfully added, they should receive an email.
Setting up access for target tenant
The email contains a link that must be opened by the user from the target tenant. This opens the Azure portal in the target tenant.
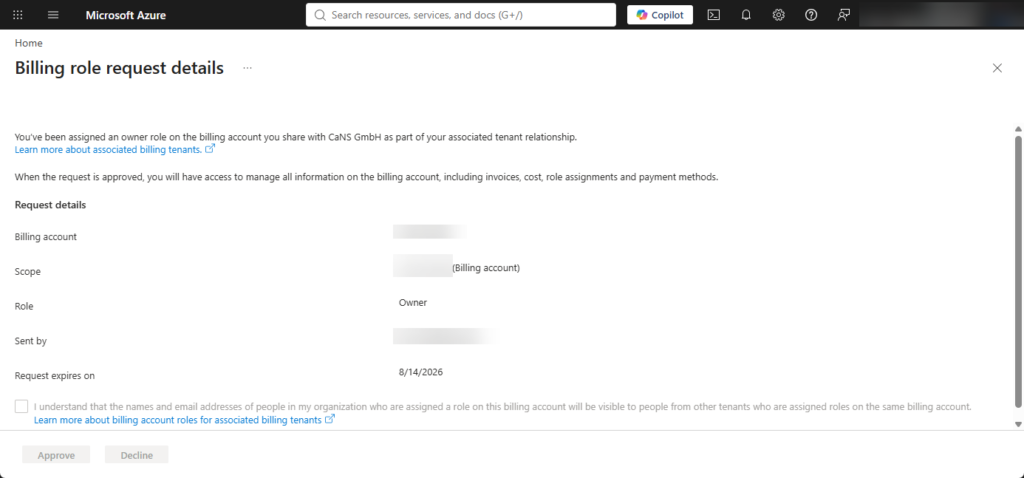
(Note: In my case, the request has already been confirmed, so the options in the image are grayed out.)
- Review the requirements
- Check the box next to “I understand that…” and click “Approve” at the bottom
This allows the target tenant to access the partner tenant's billing profile.
Transferring a subscription
The desired benefits can now be redeemed. By default, these are always redeemed in the tenant through which the benefits are available. However, this is not a problem. By assigning the other tenant, it is possible to transfer the redeemed benefits to that tenant. To do this, follow these steps:
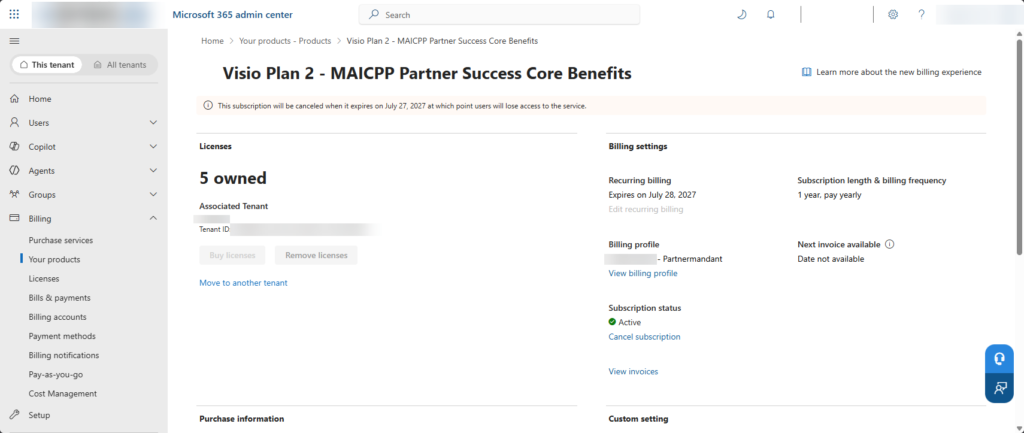
- Open product overview in the Microsoft 365 Admin Center
- If the redeemed benefit is not yet visible, select the account in which the benefit was redeemed by clicking the “Change Billing Account” button at the top (highlighted in blue).
- Select a benefit from the list—a new page will open
- Click the blue link “Move to another tenant”
- Select the desired destination client from the list and click “Move subscription” at the bottom
The subscription will now be moved to the target client and should be available there within one minute. If the subscription was accidentally moved to the wrong client, it can be moved back to the partner client at any time and then moved again from there.
Liked this article? Share it!