
Connect an application with custom attributes to Entra ID - that's how it works!
Active Directory remains the primary authentication and authorization platform for many companies. However, it is now somewhat outdated. For example, third-party solutions are required to add MFA functions.
In addition, modern alternatives are available that add many more features in terms of convenience and security. Microsoft is clearly positioning Entra ID as the successor to Active Directory. As a result, many companies are now taking this route and no longer integrating their applications into Active Directory in the traditional way, but rather connecting them to Entra ID. The advantages are obvious:
- Access control via conditional access
- Administration in accordance with principles such as JIT (Just In Time, time-bound activation of permissions) and JEA (Just Enough Administration, use of the minimum necessary permissions)
- Use of modern access and authentication protocols and methods (e.g., Windows Hello for Business, FIDO2 security keys, etc.)
Custom attributes
Applications typically use the attributes that are standard in Active Directory for user authentication and mapping (e.g., sAMAccountName, memberOf, etc.). But what if an application wasn't originally developed for Active Directory? Then it might use completely different attributes that don't exist in Active Directory at all, and certainly not in Entra ID.
So what now? Do such applications need to be completely rewritten or rebuilt? Rhetorical question, simple answer: no! Instead, Active Directory and EntraID can be adapted so that such attributes can be added and used. However, this isn't quite so trivial to implement.
Therefore, this article will illustrate how this works with a clear example.
Example scenario: Intranet modernization
Description of the scenario
A company I'm supporting uses a Unix-based intranet solution. Previously, this system used its own LDAP system with specific authentication attributes. As part of a modernization project, authentication was to be migrated to the company's Active Directory. At a later stage, a complete migration to Entra ID is planned.
However, contrary to its name, the intranet is not used exclusively for internal purposes but also for external access. Therefore, it was necessary not only to provide the specific attributes but also to create, configure, and synchronize additional users for external manufacturers and suppliers. These users were also required to use separate domains, depending on the partner type, rather than the company's domain.
To clarify the following explanations, the table below defines some key terms:
| Expression | Category | Description |
|---|---|---|
| Agent | Partner type | Categorization of newly created users into different areas and corresponding configuration of the login name. |
| Supplier | Partner type | Categorization of newly created users into different areas and corresponding configuration of the login name. |
| active | Custom attribute | Mark the user as "Active/Enabled" |
| agentid | Custom attribute | Representative number |
| employeeof | Custom attribute | Company number |
| tdssupplierid | Custom attribute | Producer/supplier |
| tdssuppliersubid | Custom attribute | Producer abbreviation |
| teamid | Custom attribute | Representative area |
This article uses the company name "Microwsoft" as an example. The company's logon domain is accordingly "microwsoft.de".
Step 1: Add custom domains
To allow external users to authenticate with both Active Directory and Entra ID, two additional custom domains first had to be added. For simplicity, subdomains of the existing login domain were chosen for this purpose:
- agent.microwsoft.de
- supplier.microwsoft.de
Active Directory
In Active Directory, these are added as follows:
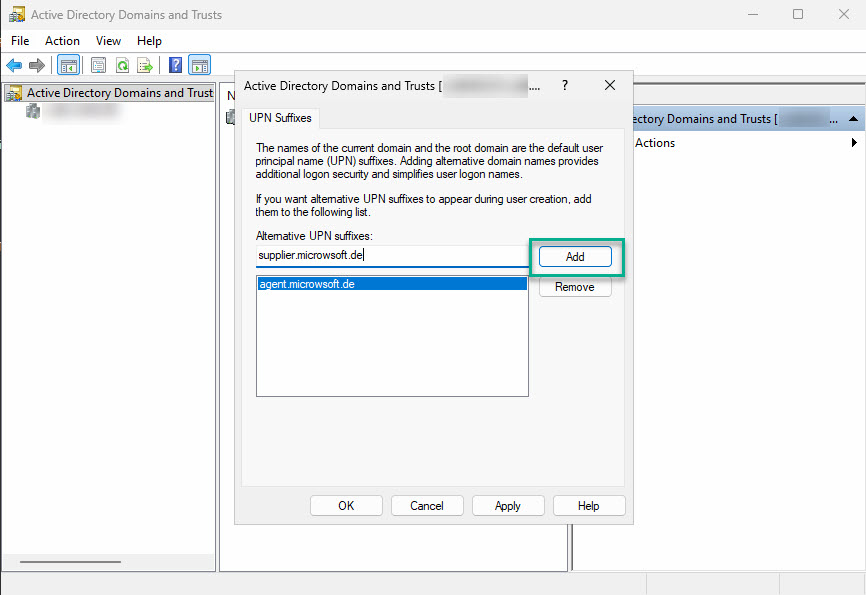
- Open the "Active Directory Domains and Trusts" console from the administrative tools.
- Right-click on "Active Directory Domains and Trusts" and select "Properties."
- Add the additional suffixes one by one.
- Close the window by clicking "OK."
Using PowerShell is a bit faster:
# Retrieve Active Directory forest and add new suffixes
Get-ADForest | Set-ADForest -UPNSuffixes @{add="agent.microwsoft.de","supplier.microwsoft.de"}Entra ID
These must also be added to Entra ID. Since the parent domain already exists there, the domain does not need to be validated via a TXT or MX record as usual.
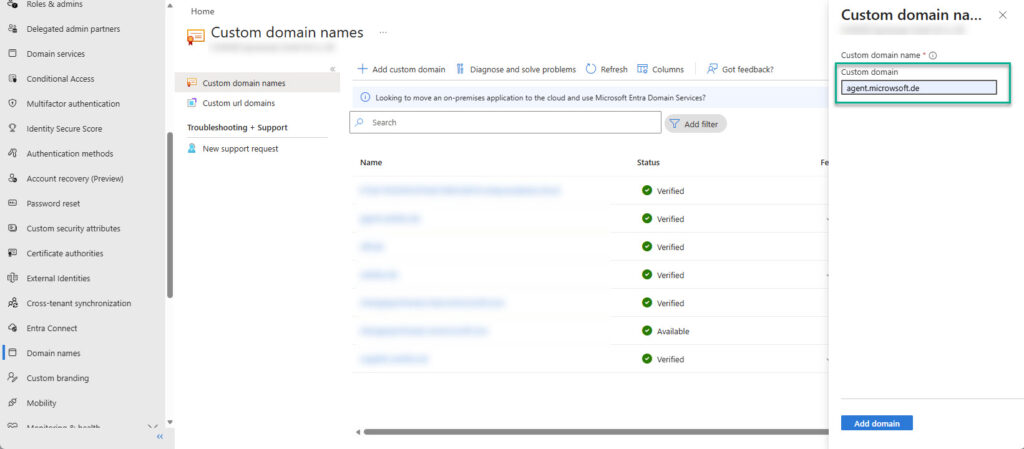
- Open domain overview: Custom domain name - Microsoft Entra admin center
- Click on "+ Add custom domain"
- Enter the name of the new domain on the right and click "Add domain".
Using PowerShell, it works as follows:
# Install necessary PowerShell module, if not installed yet
if (!(Get-InstalledModule Microsoft.Graph.Identity.DirectoryManagement -ErrorAction SilentlyContinue)){Install-Module Microsoft.Graph.Identity.DirectoryManagement -Scope CurrentUser}

# Connect to Microsoft Graph
Connect-MgGraph -Scopes Domain.ReadWrite.All

# Add domains in Entra ID
New-MgDomain -Id 'agent.microwsoft.de'
New-MgDomain -Id 'supplier.microwsoft.de'From this point on, users in Active Directory can be assigned a user principal name that uses one of the domains mentioned above. This name is synchronized with the Entra ID and can then be used for login there as well.
Step 2: Add custom attributes
Now the user-defined attributes need to be made available.
Active Directory
The attributes must be added to the Active Directory schema. However, the console required for this is not available by default for security reasons and must first be registered via the command line or PowerShell.
regsvr32 schmmgmt.dllA new MMC console window can then be opened by typing "mmc" in the still-open command prompt window. The snap-in for the Active Directory schema can then be added via "File > Add/Remove Snap-in...".
The attributes must then be added via the console as follows:
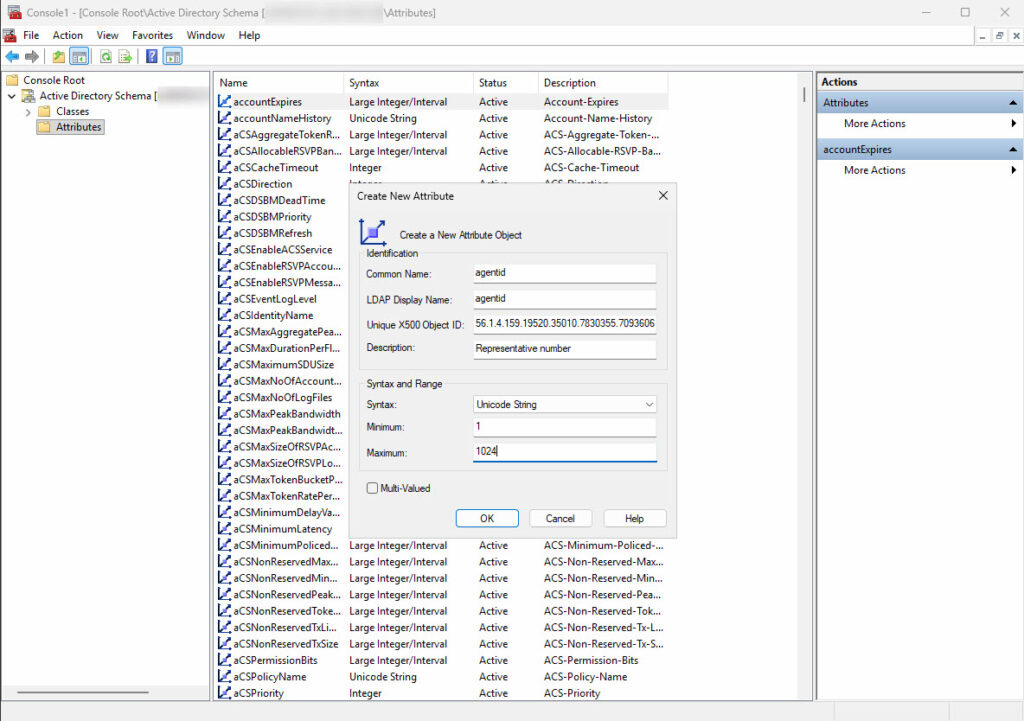
- Right-click the "Attributes" folder and select "Create Attribute..."
- Confirm the warning (attributes cannot be deleted later)
- Populate the attribute data according to specifications from another environment
- Repeat these steps for additional attributes
- Switch to "Classes"
- Select the "user" class from the list and open it with a double-click
- Switch to the "Attributes" tab and add the new attributes in the "Optional" section
- Close all windows with "OK".
Note: The unique X500 OID must be generated individually. Microsoft provided a script for this purpose, but the official link is no longer functional. Therefore, the script can also be downloaded from my script nest. Once the setup is complete, the snap-in should be unregistered again:
regsvr32 /u schmmgmt.dllEntra Connect Sync
Once the attributes are configured, the next step is to adjust the synchronization with Entra ID. Entra Connect Sync is used for this purpose within the company.
If your company uses cloud synchronization, directory extensions are provided differently. Microsoft describes the procedure in an official article: Microsoft Entra Cloud Sync directory extensions and custom attribute mapping - Microsoft Entra ID | Microsoft Learn
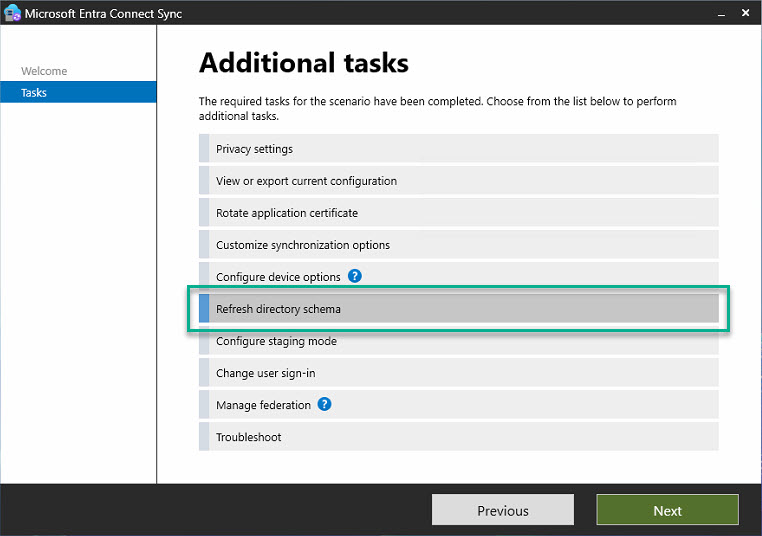
Step 1: Update Directory SchemaThe wizard essentially just needs to be followed along with a few clicks; no special steps are required. This places the new attribute in the Entra Connect Sync database and enables its synchronization.
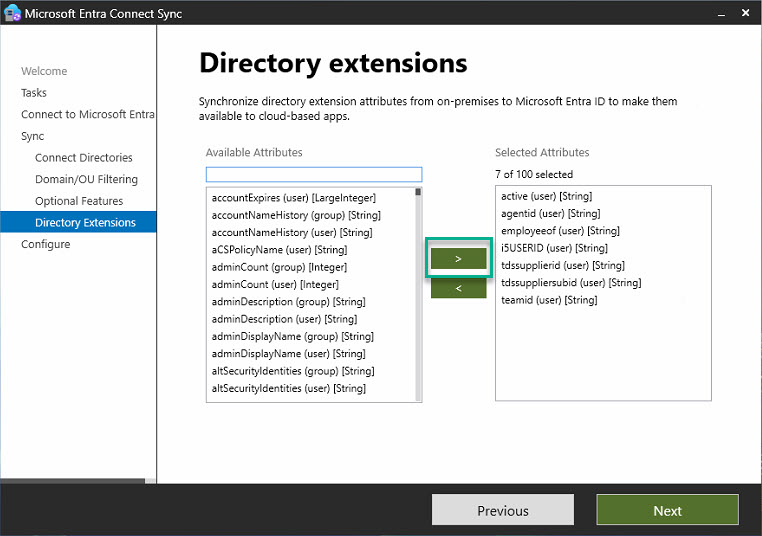
Step 2: Configure directory extension attribute synchronization
- Select the "Customize Synchronization Options" option.
- Click through to the "Optional Features" section and check the box next to "Directory Extensions Attribute Synchronization."
- In the next window, add the newly created attributes.
- Complete the wizard.
After completing the wizard, the contents of the new attributes will now be synchronized to Entra ID.
Specifically, the new attributes are attached to the so-called "Tenant Schema Extension App." This app is created by Entra Connect Sync during installation and is used to extend the attributes in Entra ID.
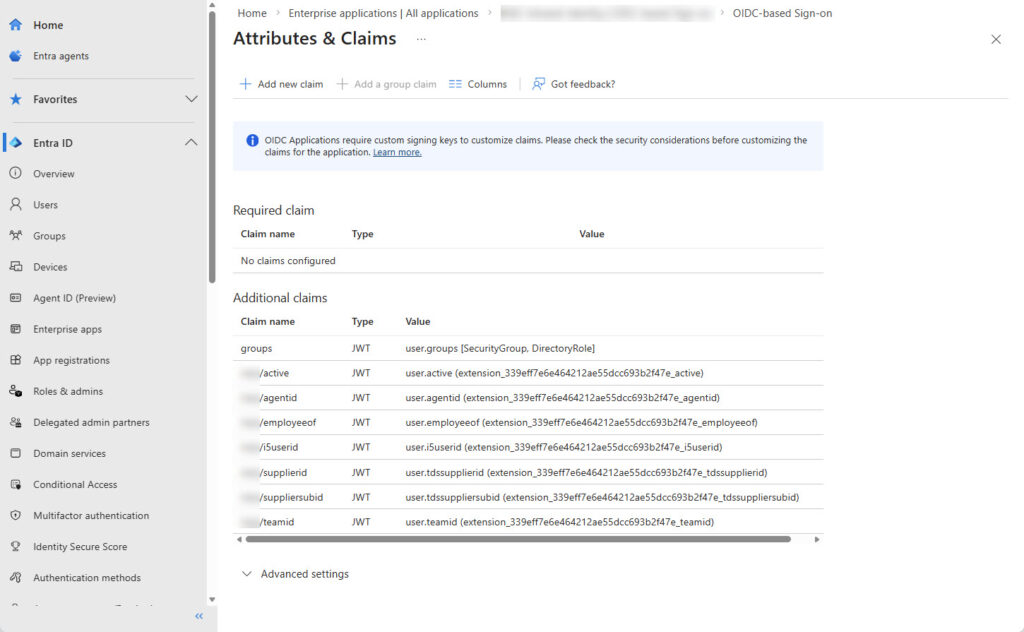
Step 3: Configure the enterprise app with the new attributes
In Entra ID, a corresponding enterprise app must be created for the application. Within the app, the new attributes must be assigned accordingly.
The following image shows an example of this for the enterprise application at the company:
Liked this article? Share it!