
Create home directories automatically - with PowerShell!
In many companies, employees still have access to personal directories on the file server—so-called home directories. These directories can be used to store files intended solely for personal use (though ideally not music collections 😉).
While there are now more modern approaches to this—such as OneDrive and the associated redirection of known folders—not all companies may be able or willing to use these approaches. There are various approaches for creating home directories:
- Manually (create folders and assign permissions)
- Automated via the user object in Active Directory (permissions are automatically assigned correctly)
- Automated via scripts
I see the second option in particular time and again. However, this is also the most dangerous, because it requires permissions in both Active Directory and on the file server where the folder is created. This, however, contradicts common security principles such as the tiered model (also known as the “tiering model”).
So how can I automate this while keeping it secure? The answer is: PowerShell!
Prerequisites
The list of requirements is quite short:
- Service account with read access to Active Directory—we recommend using a group-managed or delegated managed service account (gMSA or dMSA) for this, since no passwords need to be used or stored.
- Scheduled task—this can be set up on either a file server, a Tier 1 jump server, or a task server dedicated to this purpose.
- PowerShell script—you can download this from my script nest.
Prepare the service account
First, you need to set up a service account in Active Directory. The following sections focus on the modern gMSA and dMSA account types, since creating a standard user account shouldn't be particularly difficult. 😉
Create the KDS root key
For both account types, a Key Distribution Service (KDS) root key must first be created in Active Directory. This can only be done using PowerShell. The parameters ensure that the key takes effect immediately:
# Create KDS root key and set effective time to -10 hours
Add-KdsRootKey –EffectiveTime ((get-date).addhours(-10))Create group for permitted systems
For both account types, the authorized systems must be explicitly configured. To allow for flexible adjustments later on, an Active Directory group should be created for this purpose. The group type is generally irrelevant; typically, a domain-local security group is used.
The computer account(s) that are to use the MSA must be added to the group. To avoid the reboot that would normally be required, the following command can be executed on the systems to delete the Kerberos tickets for the computer account:
klist purge –li 0x3e7Create the service account
The choice of service account type depends on the operating system used by the domain controllers and target system(s):
- A gMSA can be used starting with Windows Server 2008 R2.
- A dMSA can only be used starting with Windows Server 2025, and this applies to both domain controllers and target system(s).
It does not appear to be possible to use a dMSA for scheduled tasks, as the account cannot be assigned to the scheduled task. Microsoft's documentation does not mention this. Until I find a clear explanation, I will leave the instructions as they are for now.
The account must be created using PowerShell. You can choose any name you like, but it should follow your own naming convention for service accounts.
Note: The name must be no longer than 15 characters:
# Retrieve Active Directory and group name
$ADFQDN = (Get-ADDomain).DnsRoot
$ADGroup = Read-Host 'Please enter group name'
$MSAName = Read-Host 'Please enter service account name'
$Description = Read-Host 'Please enter description'
$DNSHostName = $MSAName + '@' + $ADFQDN

# Variant A: create gMSA
New-ADServiceAccount -Name $MSAName -DNSHostName $DNSHostName -PrincipalsAllowedToRetrieveManagedPassword (Get-ADGroup -Identity $ADGroup).DistinguishedName -KerberosEncryptionType 'AES256'

# Variant B: create dMSA
New-ADServiceAccount -Name $MSAName -DNSHostName $DNSHostName -PrincipalsAllowedToRetrieveManagedPassword (Get-ADGroup -Identity $ADGroup).DistinguishedName -KerberosEncryptionType 'AES256' -CreateDelegatedServiceAccount

# Only variant B: enable dMSA
Set-ADServiceAccount DMSA-0001 -Replace @{"msDS-DelegatedMSAState" = 3}If read access to Active Directory is restricted, the service account must then be granted read access to Active Directory or to the organizational unit where the user accounts are located.
Enable using MSA on target system
To perform scheduled tasks, the service account must be granted the “Log on as a batch job” permission on the target system. This can be configured using Group Policy or the Local Security Policy console:
Computer Configuration > Policies > Windows Settings > Security Settings > Local Policies > User Rights Assignment
- Setting: Log on as a batch job; Add service account to the list
If a dMSA is used, a setting must also be deployed to the target system via Group Policy or a local registry setting:
Computer Configuration > Policies > Administrative Templates > System > Kerberos
- Setting: Enable logins for delegated managed service accounts
Provide script
The script must be deployed on the target system. From there, it will be integrated into the scheduled task in the next step. The script still needs to be customized to reflect your organization’s specific settings (e.g., OU and file paths).
Tip: To quickly locate scripts that are run locally, we recommend storing them in a single folder, such as C:\TASKS.
Create scheduled task
You can now set up the scheduled task on the target system. To do this, open the “Task Scheduler” console (command line: tasksched.msc).
Tip: To clearly distinguish custom tasks from other tasks, we recommend creating a subfolder and naming it the same as the folder in the file system (e.g., “TASKS”).
This folder will then group all the tasks you've added yourself.
The following steps should be followed when planning tasks. The parameters listed are examples and can be adapted to your specific needs:
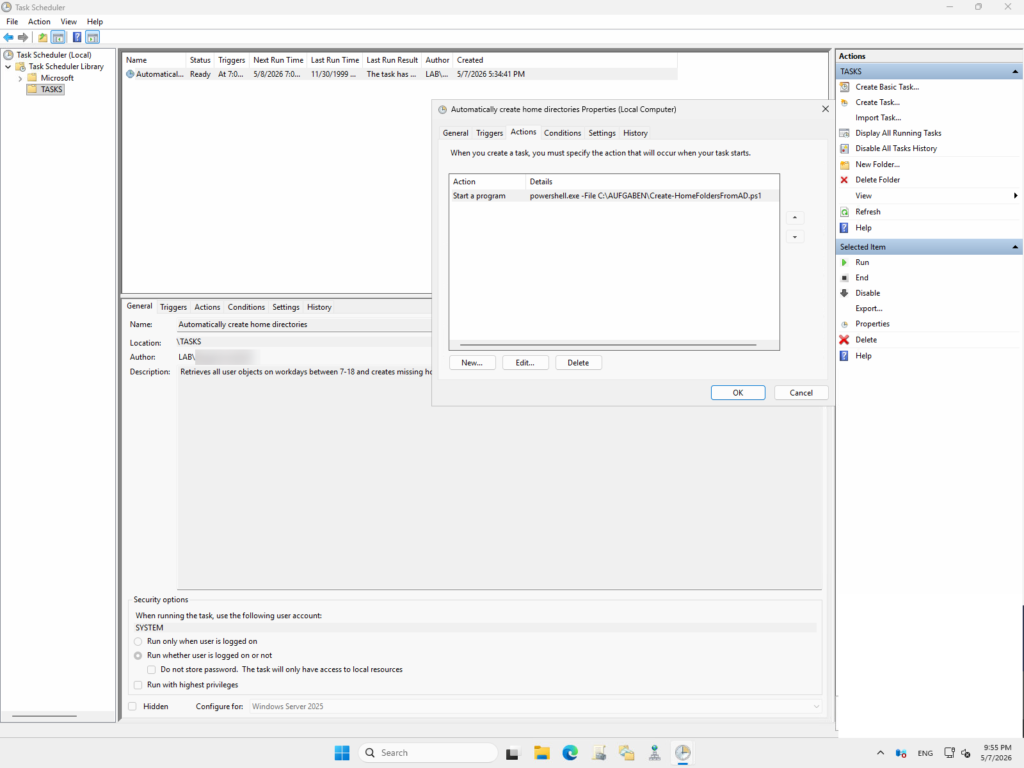
- Choose "Create task"
| Tab | Setting(s) |
|---|---|
| Name | Automatically create home directories |
| Description | Retrieves all user objects on workdays between 7-18 and creates missing home directories. |
| Trigger | Weekly, Mo.-Fr. Start: 7 Repeat for 11 hours |
| Actions | Start program - Program/script: powershell.exe - Arguments: -File "C:\TASKS\Create-HomeFoldersFromAD.ps1" |
| Settings | Stop the task if it runs longer than: 1 hour |
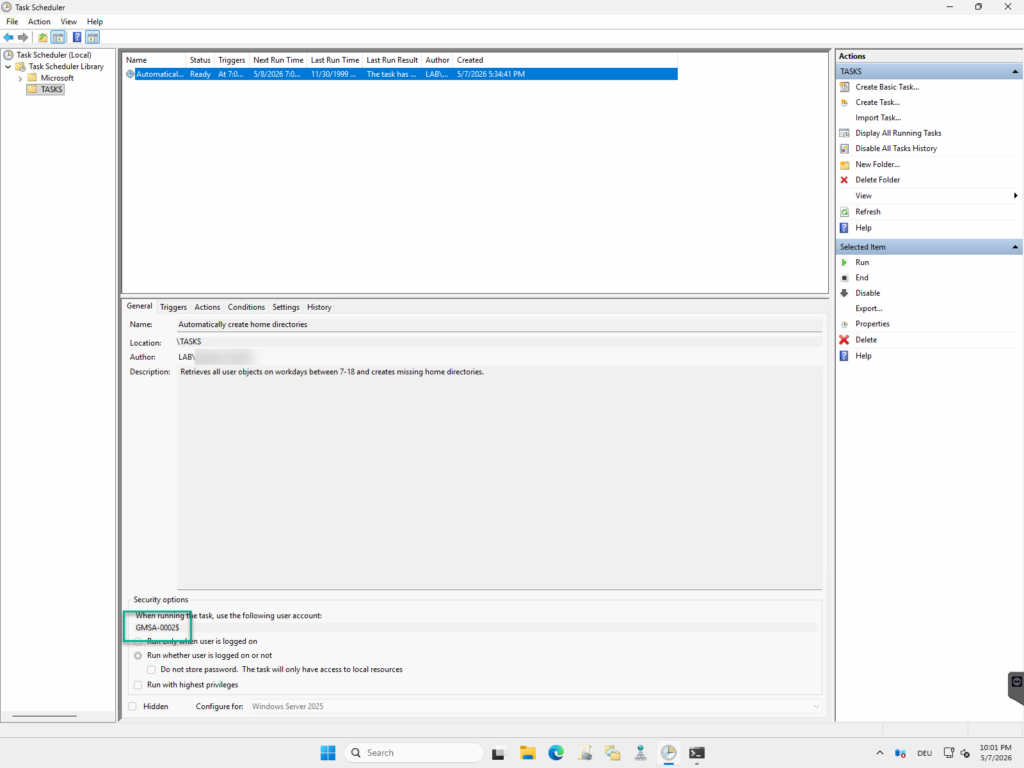
If a standard service account is used, it can also be configured using the wizard (“Save independently of user login”). If a managed service account is used, it must be added via PowerShell after the task has been created:
# Show dialog for choosing the scheduled task
$Selection = Get-ScheduledTask | Where-Object {$_.TaskPath -notlike '\Microsoft\*'} | Out-Gridview -Title 'Please choose scheduled task' -OutputMode:Single
$MSAName = 'Please enter account name in the format DOMAIN\ACCOUNT NAME'

# Set needed syntax for username
$MSAName = $MSAName + '$'

# Configure service account for scheduled task
Set-ScheduledTask -Taskname "$Selection.TaskName" -TaskPath "$Selection.TaskPath" -Principal (New-ScheduledTaskPrincipal -UserId $MSAName -LogonType Password)When the view in Task Scheduler is refreshed, the service account is now assigned to the scheduled task.
Test functionality
Time for a test! You can run the task directly by right-clicking. Normally, the script shouldn't take long to run (depending on how many users there are).
If everything has been configured correctly, any missing folders should appear in the root folder for the home directories. If all folders are already present, a test user should be created in Active Directory to verify the script’s functionality.
Liked this article? Share it!